Thin Crust Pizza Dough
Delivery may be convenient, but homemade pizza has so much more flavor, and you get to enjoy it hot and melty right out of the oven. Surprisingly easy to make, it’s just a few minutes of kneading by hand. Pizza lovers, rejoice!
This recipe yields a pizza crust with a crisp, bubbly edges and thin center allowing the toppings to shine.
As indicated in the recipe below, the dough needs to rest 8 to 36 hours in the refrigerator for the yeast to do its magic. I think the dough tastes (and looks) best after 24 hours of resting, and is easiest to work with.
Need some topping ideas? Check out my recipes for Garlic Shrimp Pizza, and my Goat Cheese, Caramelized Shallot and Rosemary Pizza, I’ve also included a simple recipe for a basic cheese pizza at the bottom of this page.
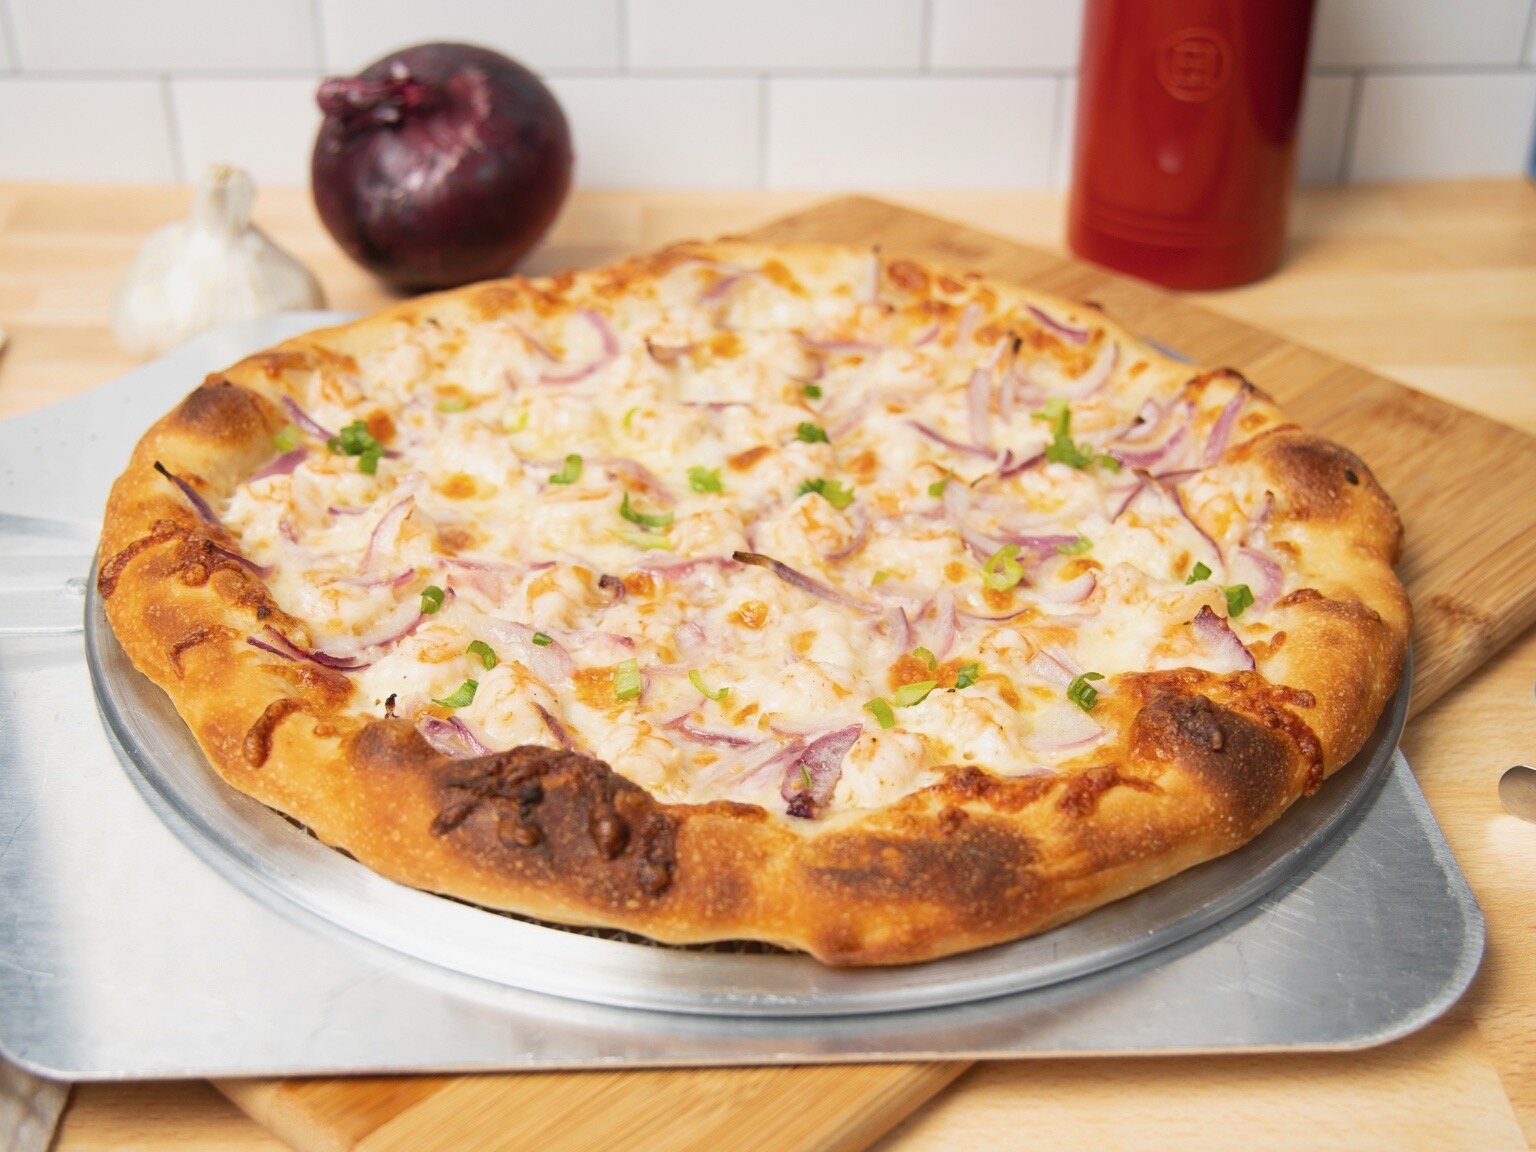
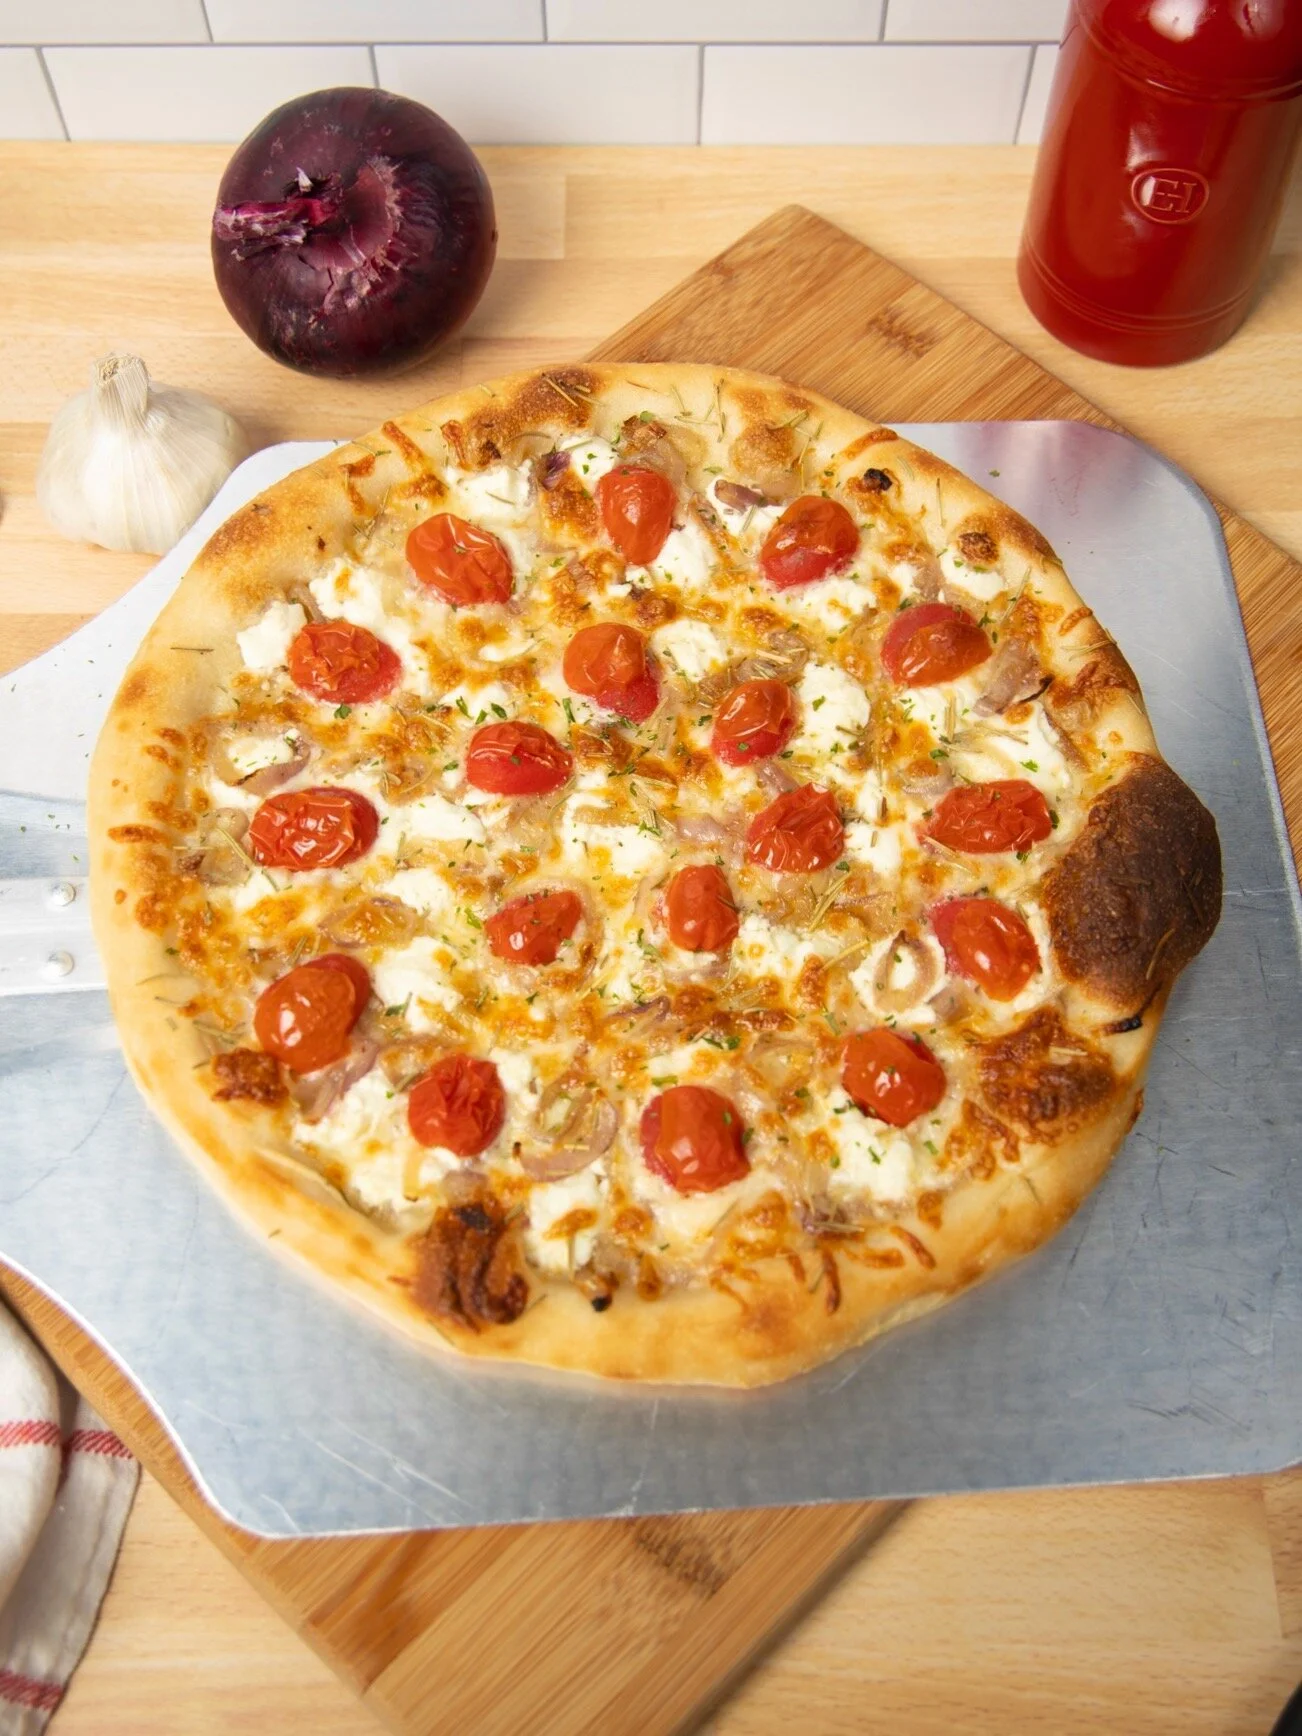
Garlic Shrimp Pizza. 24 hours of rest time yields a crisp, bubbly crust, but still very thin in the middle. (Photo by Daniel Marks)
If you plan to make a lot of homemade pizza, in addition to investing in a Pizza stone, I suggest adding a mesh pizza pan to your collection if, like me, you’re not an expert with a pizza peel. It can be tricky transferring a floppy thin crust pizza from the counter to the oven. The mesh pizza pan eliminates this problem and you still get a nice crisp crust because the mesh allows the heat from the stone to get through.
I’ve included a recipe for a basic cheese pizza at the bottom of this post.

(Photo by Daniel Marks)

Thin Crust Pizza Dough Recipe:
Yield:
Dough for two, 12-inch round, thin crust pizzas
Difficulty:
Easy
Plan ahead:
The dough needs at least 8 hours to rest in the refrigerator + 1 hour at room temperature before you can start adding toppings. It’s best if you can wait 24 hours.
Equipment:
Digital kitchen scale for weighing ingredients
Pizza Dough Ingredients:
312 grams all-purpose flour
1 tsp fine kosher salt or table salt
½ tsp garlic powder, optional
1 tsp olive oil
¾ tsp active dry yeast
200 ml warm water, 100° F - 110° F
Instructions:
In a large bowl, whisk together flour, salt, and garlic powder if using.
Combine warm water, yeast, and oil, then add to the bowl with the flour. Mix all ingredients with your hand, a wooden spoon, or a dough whisk (not a standard whisk, the dough will stick to it) until it forms a sticky dough.
Turn the dough out onto a clean work surface and knead briskly for 3 minutes. A bowl scraper is useful for handling the dough. It will be very sticky at first, but smooth out as you continue to knead. Let sit for 15 minutes covered with a lightly damp towel, then knead again for another 3 minutes. At this point your dough should be smooth and slightly tacky but not sticky.
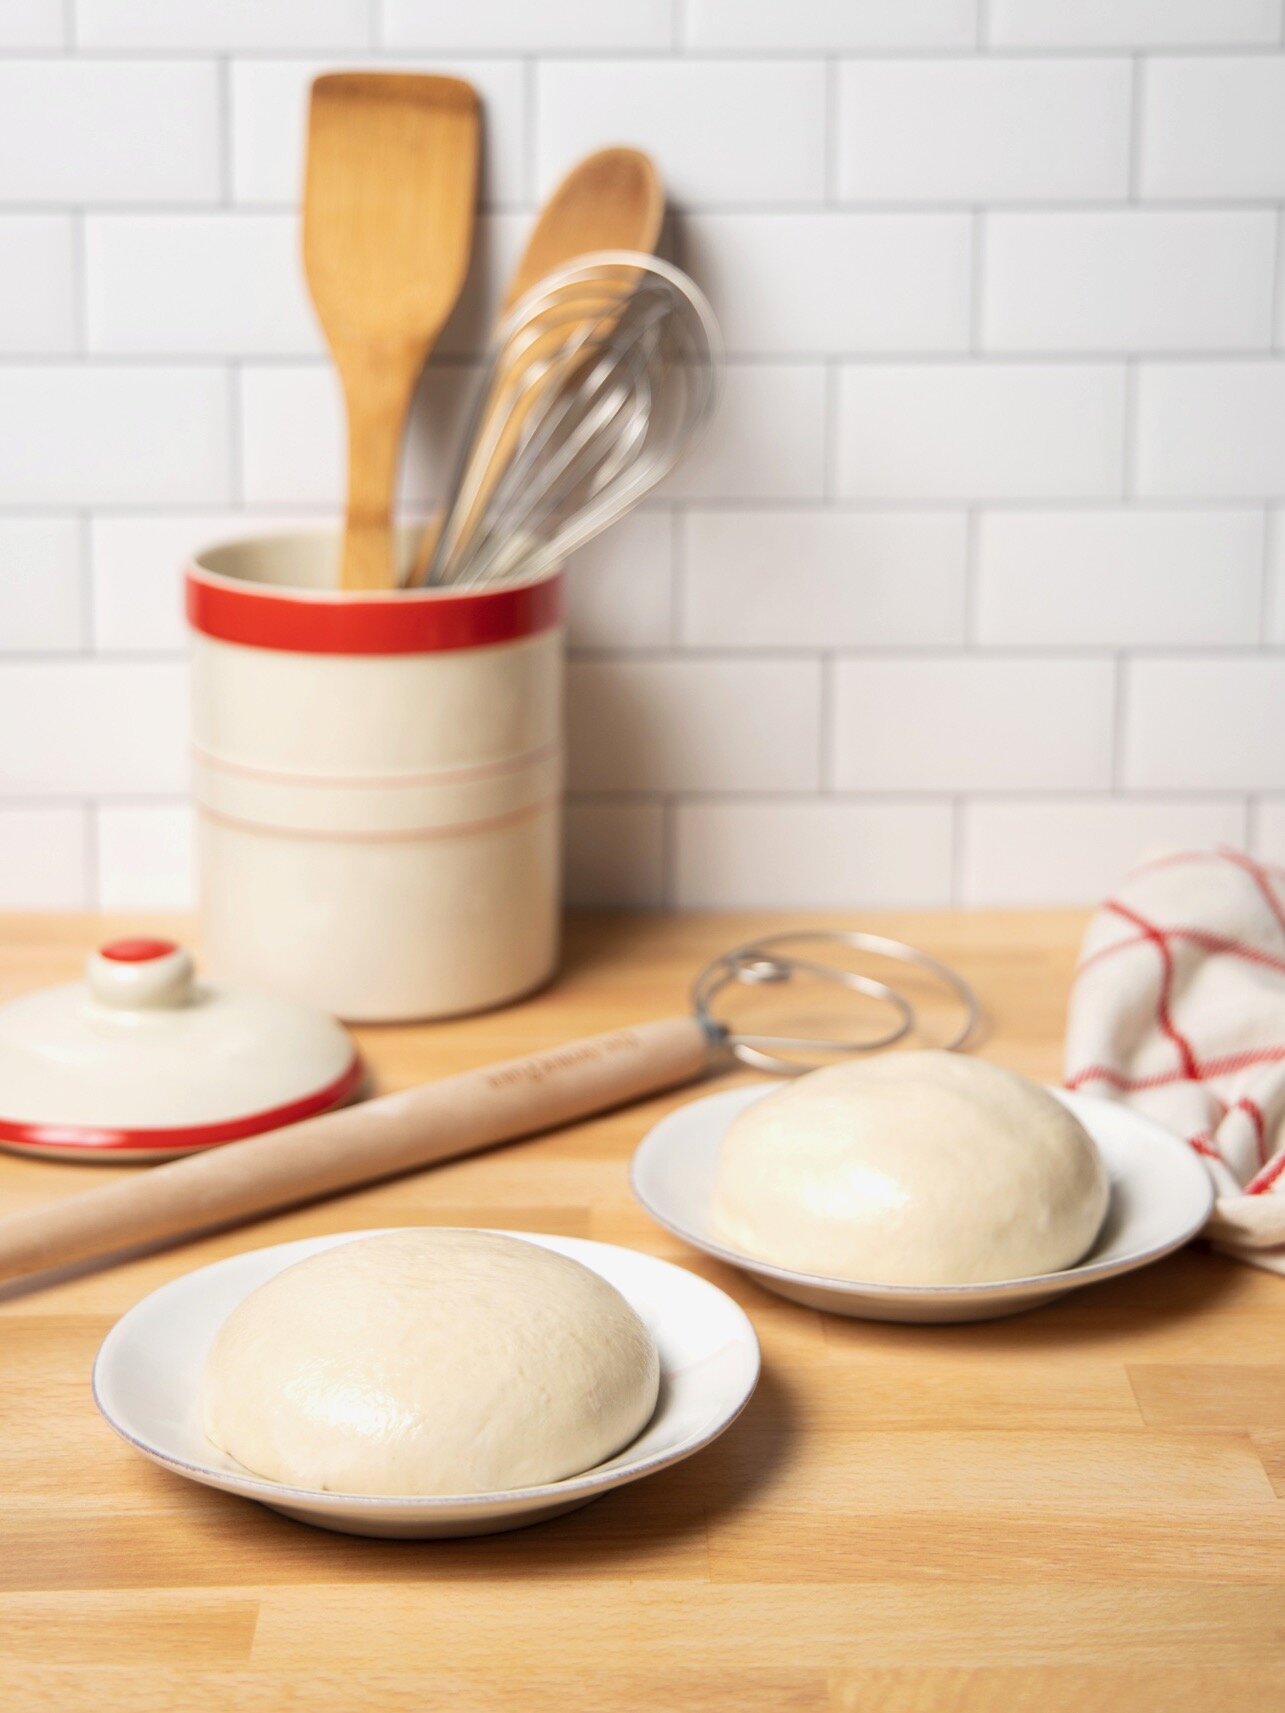
Divide the dough in 2 even pieces with a knife or bench scraper. Shape each piece into a ball, lightly coat the ball in olive oil, and place each ball on it’s own small plate (I use salad plates). Cover the plates in plastic and refrigerate for at least 8 hours and up to 36 hours.
Remove dough balls from refrigerator and let sit at room temperature for one hour before you stretch it out. This is a good time to place your pizza stone in the oven and start preheating. I recommend 500° F, but you should follow the baking instructions of whatever topping recipe you’re following.
To stretch the dough:
On a clean work surface, with your fingertips about an inch from the edge, start pressing/patting the dough out into a larger circle. Once it’s at about 8 inches in diameter, lift at one edge and start stretching just the edges out. Your hands should be side by side while stretching, not on opposite sides of the crust or you’ll tear the center. If the dough feels a little too floppy to handle easily, place on your pan and stretch out just the edges while it’s on the pan. Here’s a video showing all that:
Basic Cheese Pizza Recipe:
Equipment:
Basic Pizza Sauce*:
1, 28-ounce can crushed tomatoes (not tomato sauce)
1 TBSP olive oil
1 tsp red wine vinegar
4-6 medium garlic cloves, thinly sliced
1 tsp fine kosher or table salt
1 tsp dried basil
Pinch red chili flakes (optional)
Toppings (for 1, 12-inch pizza, double for 2 pizzas):
1 large balls fresh mozzarella, torn
2 TBSP freshly grated parmesan
1 tsp dried oregano
8-10 leaves fresh basil
*You’ll have extra sauce. It can be frozen for the next time you make pizza.
Instructions:
Place a pizza stone on the bottom rack of the oven. Preheat oven to 500°F. (My oven takes about an hour to reach this temperature)
Make the sauce: Add all ingredients to a medium saucepan and combine over medium heat. When it starts to bubble turn the heat to lowest setting and let simmer for at least 30 minutes.
Note: If making 2 pizzas, make one at a time. Stretch out the dough and add toppings to your second pizza while the first one bakes.
Hand stretch the dough into shape, and place on a mesh pizza pan (or generously floured surface if using a pizza peel). Lightly brush the edges with olive oil. Spread a light coating of sauce evenly across the prepared dough, top with mozzarella, grated parmesan, and dried oregano. Transfer pizza to the preheated pizza stone. Bake for 10-12 minutes until the crust looks done.
Use a pizza peel to remove from oven. Let sit for 2 or 3 minutes then transfer to a cutting board, slice with pizza cutter, sprinkle with fresh basil and serve.

(Photo by Daniel Marks)